vOn Rivet, you can think of a hub as a space where you and your team can communicate, organize to dos, make info easy to access, and create a record. People use hubs for things like projects, jobs, property management, and more!
Here's how to create your first project hub:
1. On mobile, you can create a hub from the Overview section, or the Hub section on the bottom nav (both circled in red below). From either, tap the blue '+' icon in the top right hand corner of the screen.
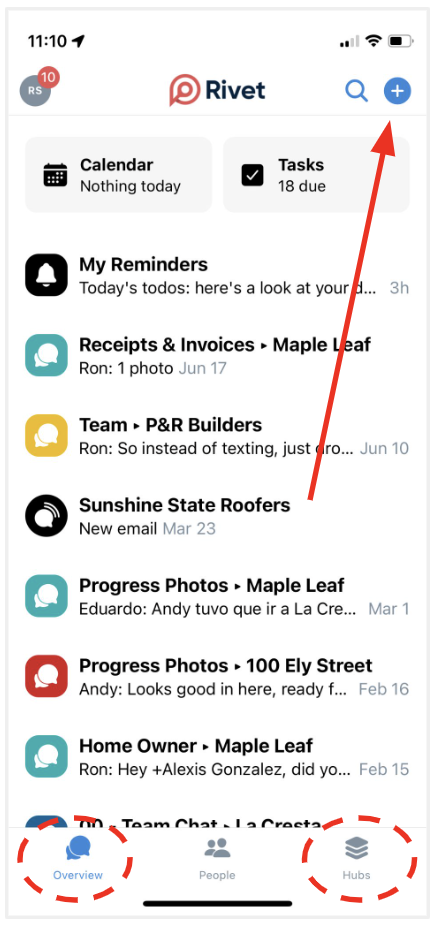
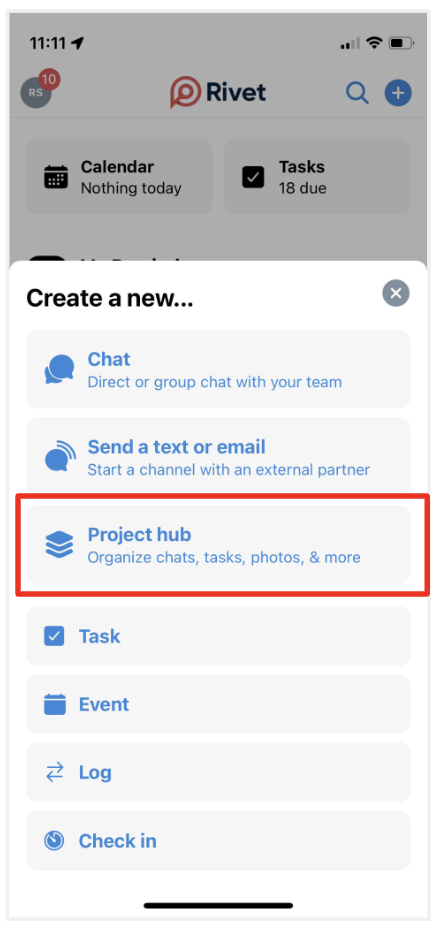
2. In this example, we'll create a hub from the 'Overview' section. Once you tap the blue '+' button, a menu will pop up. Tap the grey 'Project hub' button.
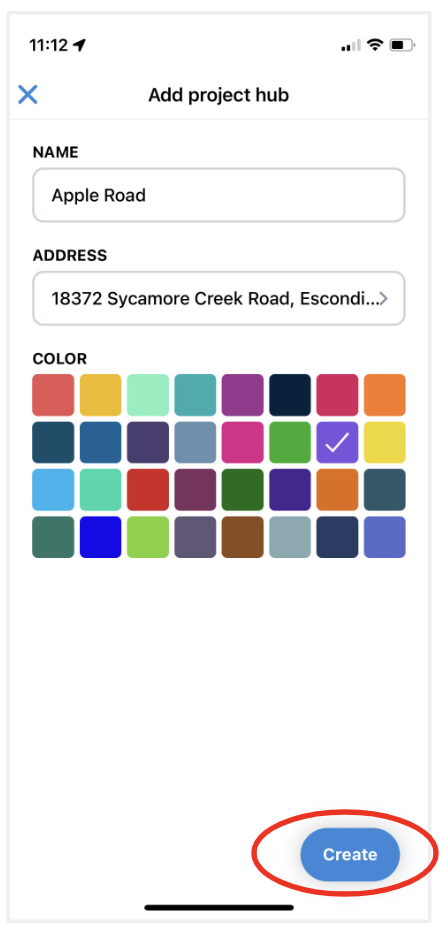
3. Next, enter a name for your hub. This name should be whatever will be clear to your team and partners to tell them what this is about. That is all the required info! Optionally, enter an address and tap the blue 'Create' button.
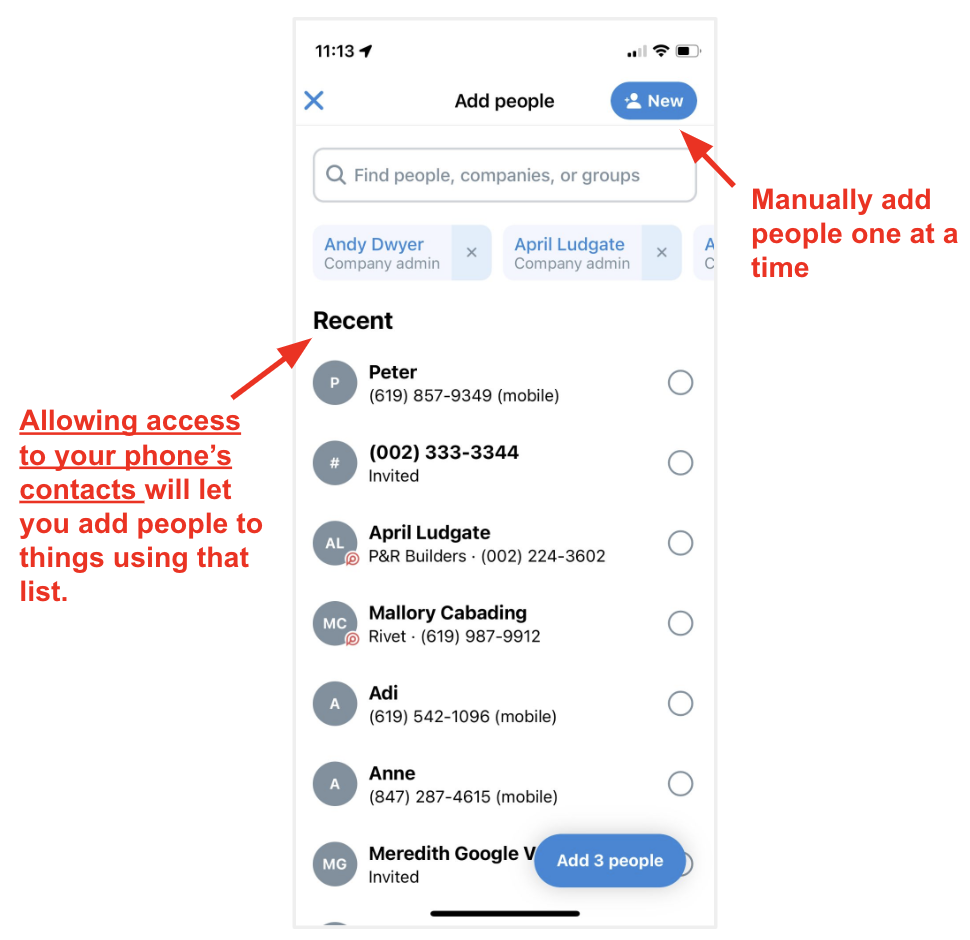
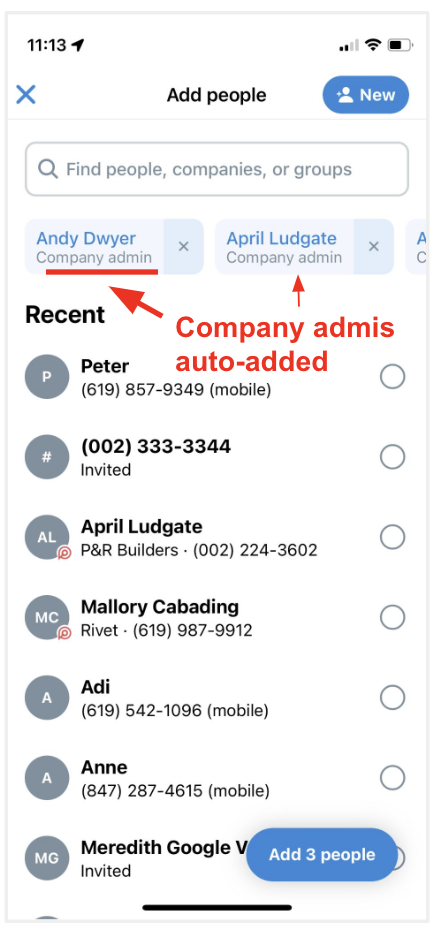
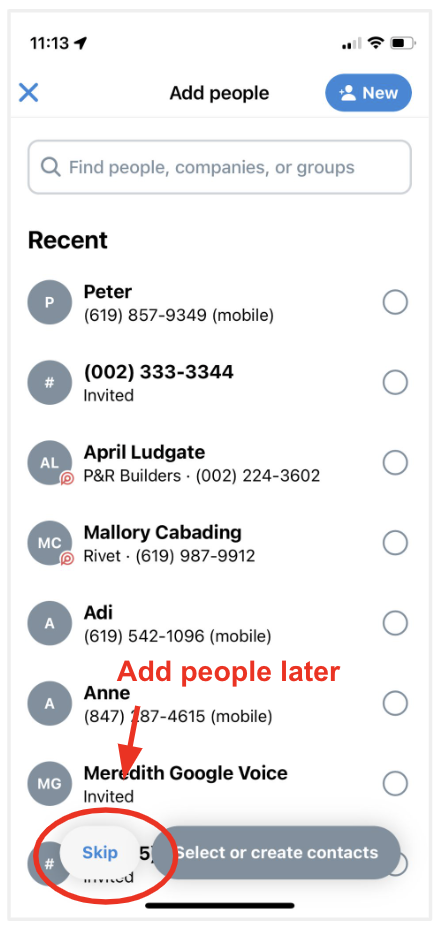
4. Next, add the people who need to be part of the project. If you've set company admins, those individuals will automatically be selected for all project hubs created. Here's how to do that. Once you've added the relevant individuals, tap the blue 'Add people' button.
5. That's it! You will land on your new project hub.
On desktop (www.web.joinrivet.com), in the 'Hub' section in the blue menu, at the top of the list of your projects, click the '+ Add project hub' text highlighted below.

Commonly asked hub questions:
What gets created when I kick off a hub?
When you create a hub, we automatically create your first chat and we name it 'Team'. You can easily change that name by:
1. Tapping into the chat
2. Tapping the grey 'Rename this chat' button.
We also automatically create a folder for your photos, files, logs, and any site check-ins. Any photos, videos, or files shared in your chats will automatically roll into your project's photos or files folders respectively to save you time!
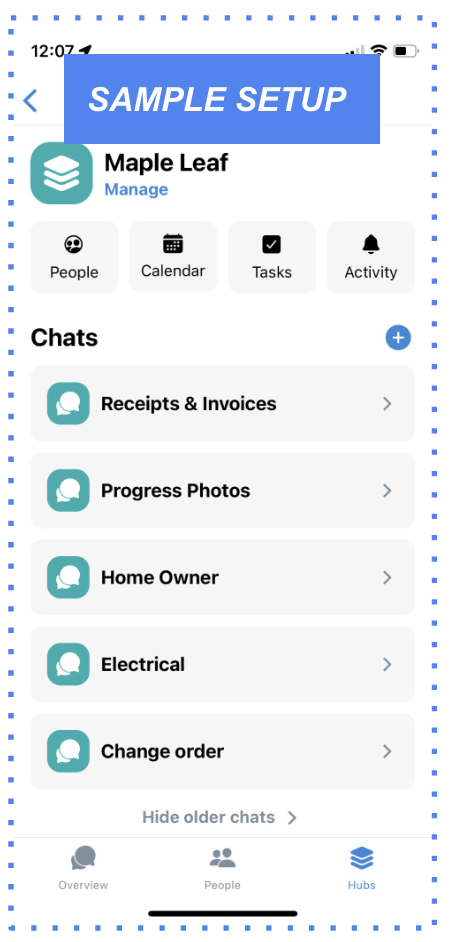
How do other contractors setup their hubs?
Below is a sample of how some contractors setup the chats in their hub. You can think of chats as group chat where you can converse, or more like folders, where you can drop photos, files, and any important info you want to organize by job, and topic.
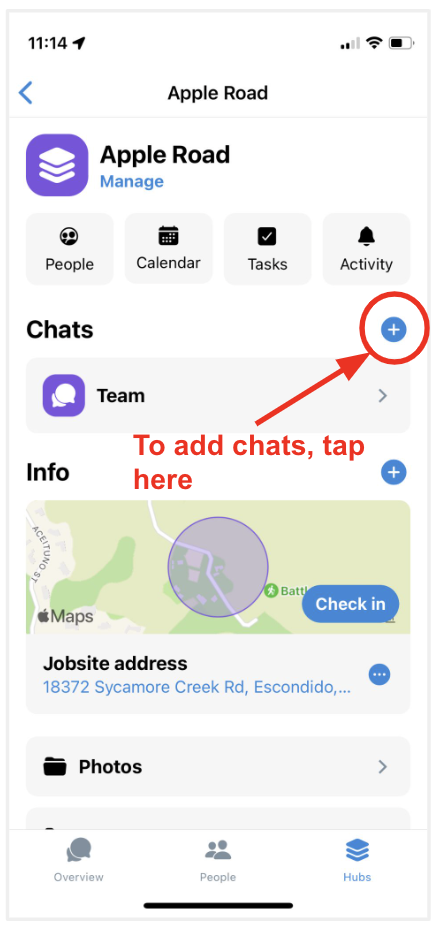
To add additional chats, tap the blue '+' in the 'Chats' section of the hub (pictured below)
How do I update my project hub color or archive?
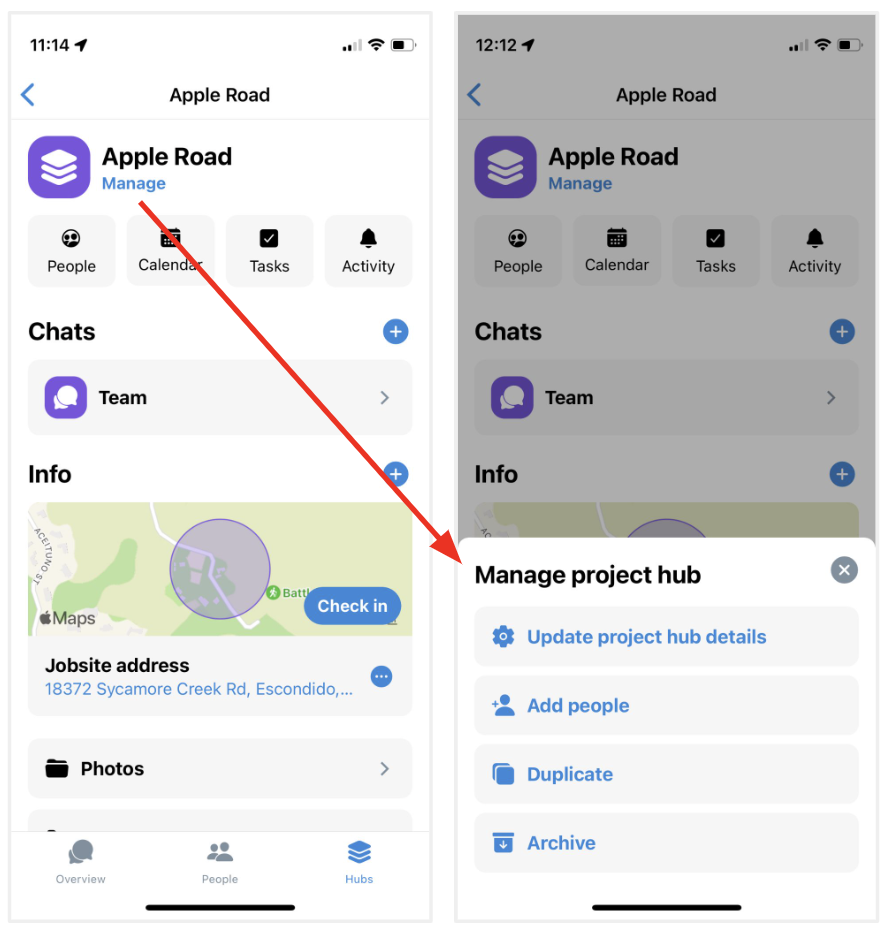
Tapping the 'Manage' link directly under the hub name lets you:
1. 'Update project hub details' (aka - update the project hub color, name, or address)
2. 'Add people' - quickly add people to the hub (this texts them an invite)
3. 'Duplicate' - this duplicates the hub structure (chats, people or members, tasks, events, or info fields)
4. 'Archive' - this sets the hub to 'inactive' and puts it in your 'Archived' section. All hub data is stored there, and you can always find it there, and re-activate.
Who can see what in a hub?
Anyone who is added to the 'People' section of the hub will be able to see the project calendar, tasks, and activity feed (which shows activity across your project folders when something is added directly to a folder). This means people will not need to be on the event or task to see them!
If you'd like to limit visibility, you can use hub chats to limit what people can and cannot see in your project hub folders (photos / files / logs).
Here's a quick example:
If you have three project hub chat titled:
1. "Homeowners" and it is just the homeowners and you
2. "Progress Photos" and it's your field team, you, and your super
3. "Sub Invoices" and it's you, your office manager, and accountant.
For you, because you are in all three project hub chats, in the hub's photos folder, any photos shared across any of those chats will be rolled up and visible to you. However, when the accountant goes to the project hub's photo folder, they will only see the photos shared in that chat they are part of. Same with the owner, and your field team.
So, if your field team hits a pipe on site, and shares a photo in the Progress photos chat, the homeowner will not see it unless you choose to forward it over!
Questions or requests? Reach out to us:
email: help@joinrivet.com
call/text: (510) 281-8840