On Rivet, you can add events to shared project hub calendars so that everyone can see what's coming up. Or, you can keep events private by adding them without a project selected to help you remember what's next!
The best part: you can add anyone to events whether they have an accounts on Rivet or not.
If invitees are not on Rivet, you can choose to send a text to let them know they've been added, and set custom reminders as the event approaches which will send them reminders via SMS.
Here's how it works:
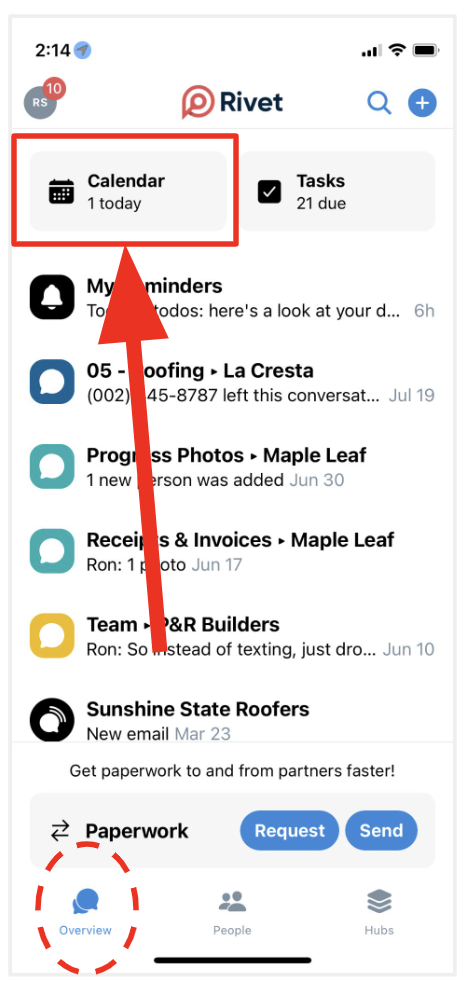
1. In the 'Overview' section on the main bottom nav, tap the grey 'Calendar' button found at the top of the section.
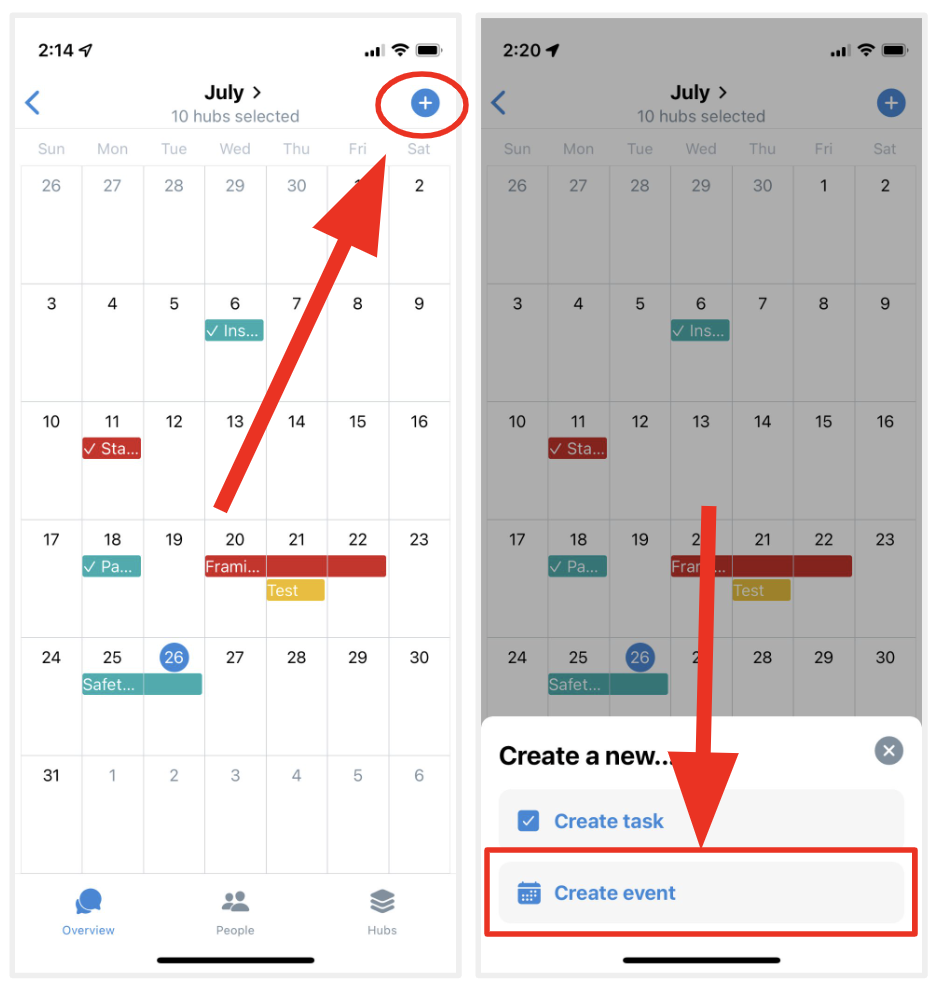
2. Next, tap the blue '+' button found in the top right hand corner, then tap 'Create event' from the menu that pops up.
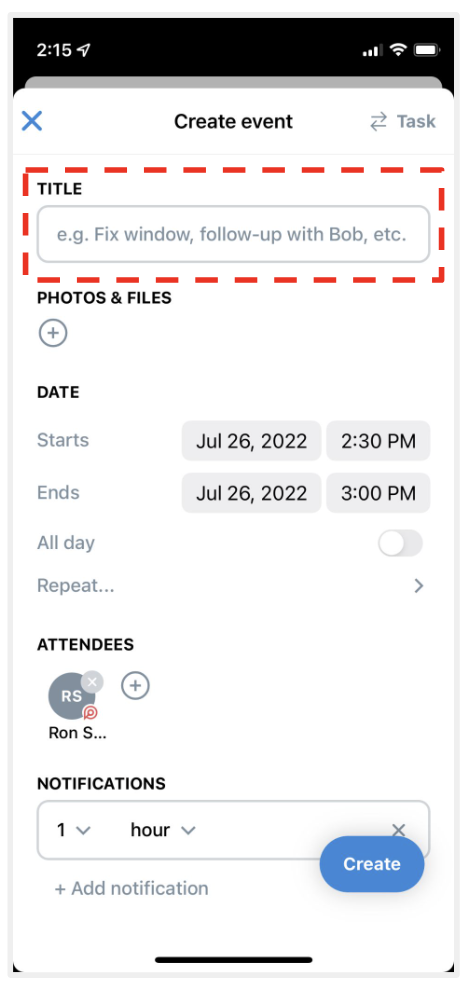
3. As you can see, the date that pre-populates is today's date, and the soonest possible time window within 30-minutes of the event creation. You can easily change this by tapping the 'date' options (which we go into more detail below).
4. Next, add your event title, like 'Rough-in framing', or 'Lumber Delivery Window'.
Additional event fields & how they work:
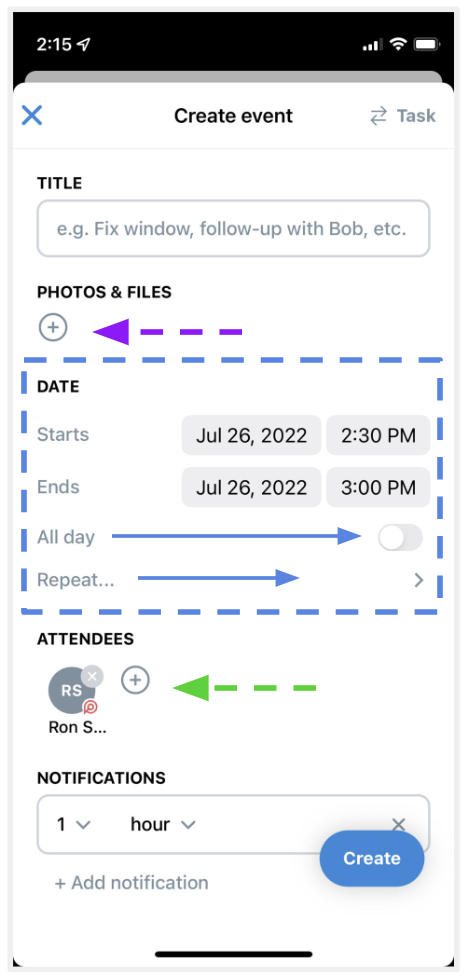
Photos & Files (PURPLE ARROW) - add photos, files, and videos to any event as a point of reference for attendees.
Date Section - to change the start or end time, tap the grey box with the date or time that you want to change.
To remove time frame to make something a full day event, tap the toggle to the right of the 'All day' label. You might use this for a multi-day install, or a holiday.
If you want the event to repeat so that you don't need to make it over and over, like for a daily progress report or weekly meeting, tap the line that says 'Repeat...' where you see the blue arrow in the screenshot above.
Attendees - Here is where you can add the event attendees. Add anyone from your phone's contacts, whether they're using Rivet or not, and the event notifications will be sent to them via text message (if they are not a Rivet member).
Notifications - we automatically add one notification to remind people of the event. To add additional notifications, tap the grey text that reads '+Add notification'. If you have a date and time based event, you can set reminders for weeks / days / hours. If you have a date only event, you can set reminders for weeks / days. For those not using the Rivet app, they will get a text message to remind them.
Hub - this is where you can tag the event to a project hub, which means anyone who is part of the hub can now see the event in that hub's calendar section. It will also automatically pull in that hub's job site address (which will text out to anyone not using the Rivet app).
NOTE: if you want to tag it to the project hub, but swap out the address, just tap the address field below the hub and type whatever address you'd like.
Notes - Add any event details here, like instructions, codes, contacts, or other relevant information for the event. Anyone not using Rivet will get this info via text message.
Questions or requests? Reach out to us:
email: help@joinrivet.com
call/text: (510) 281-8840