Adding project info to your projects on Rivet is a quick and easy way to make sure things are accessible to everyone, anywhere.
Here's how:
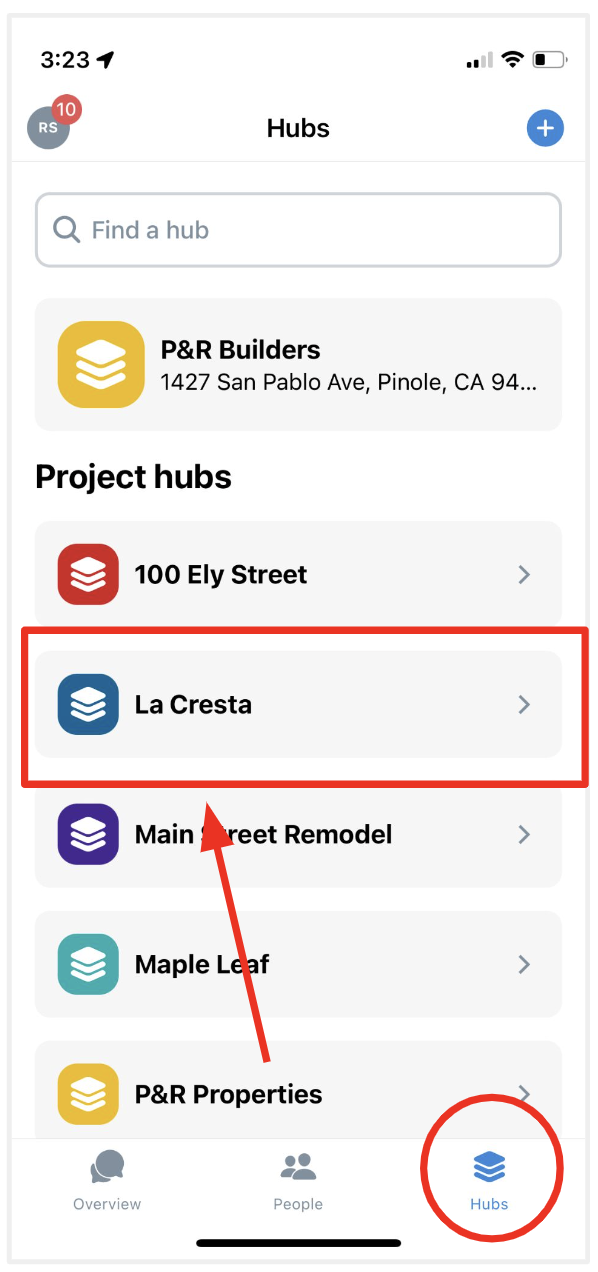
1. On mobile, tap the 'Hub' tab in the bottom navigation, then tap the project hub to which you'd like to add info.
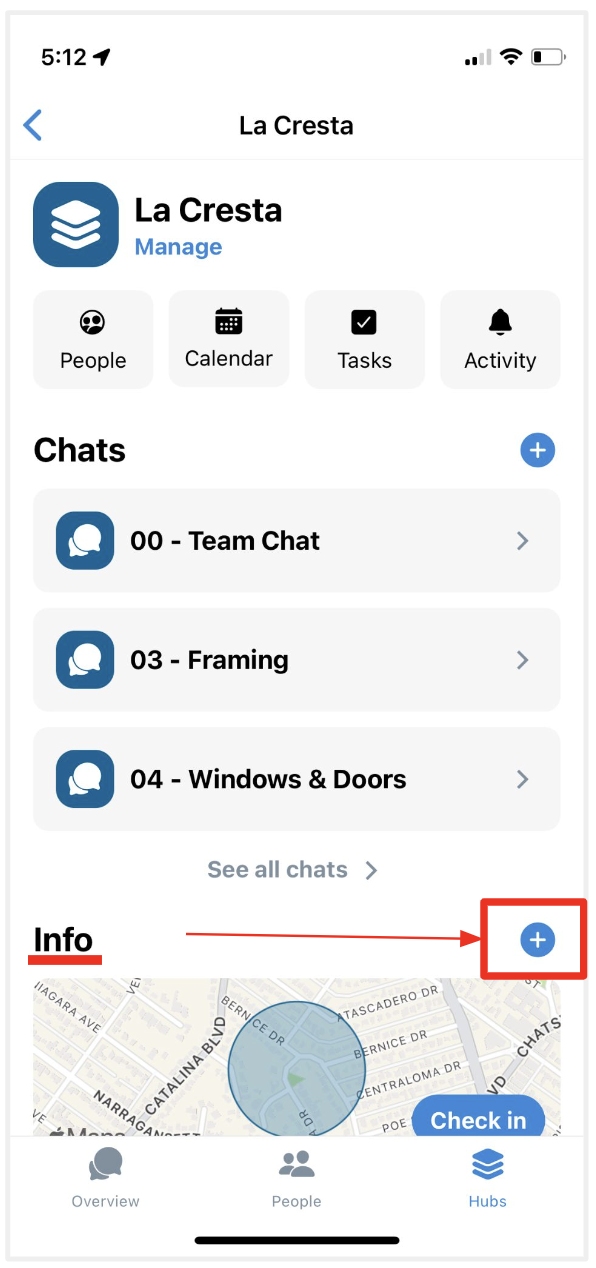
2. Next, tap the blue '+' button in the Info section.
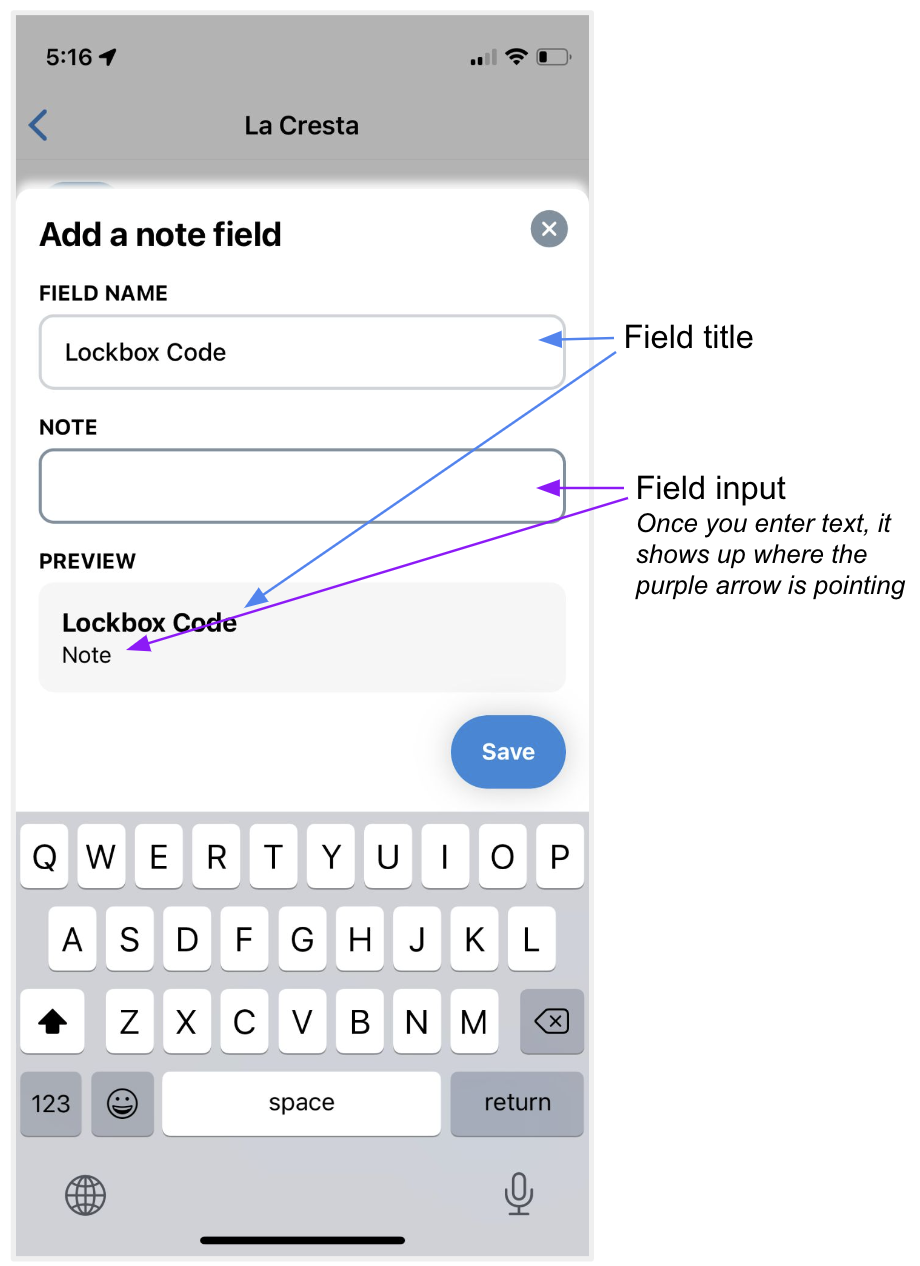
3. Next, tap whatever field type you want to add. In this example, I am going to add a lockbox code, so I will tap 'Note'

4. Next, fill in field title, and whatever you want in the field. For this example, the field name is Lockbox code, and the field input is the code. As you can see, until you enter data into the 'Note' field, it will say Note. As soon as you start typing, the 'Preview' will let you see what the field looks like.
When you're done, tap the blue 'Save' button. That's it!
On desktop? Here's how to do it there:
1. In the Hub section, click the hub to which you'd like to add info.
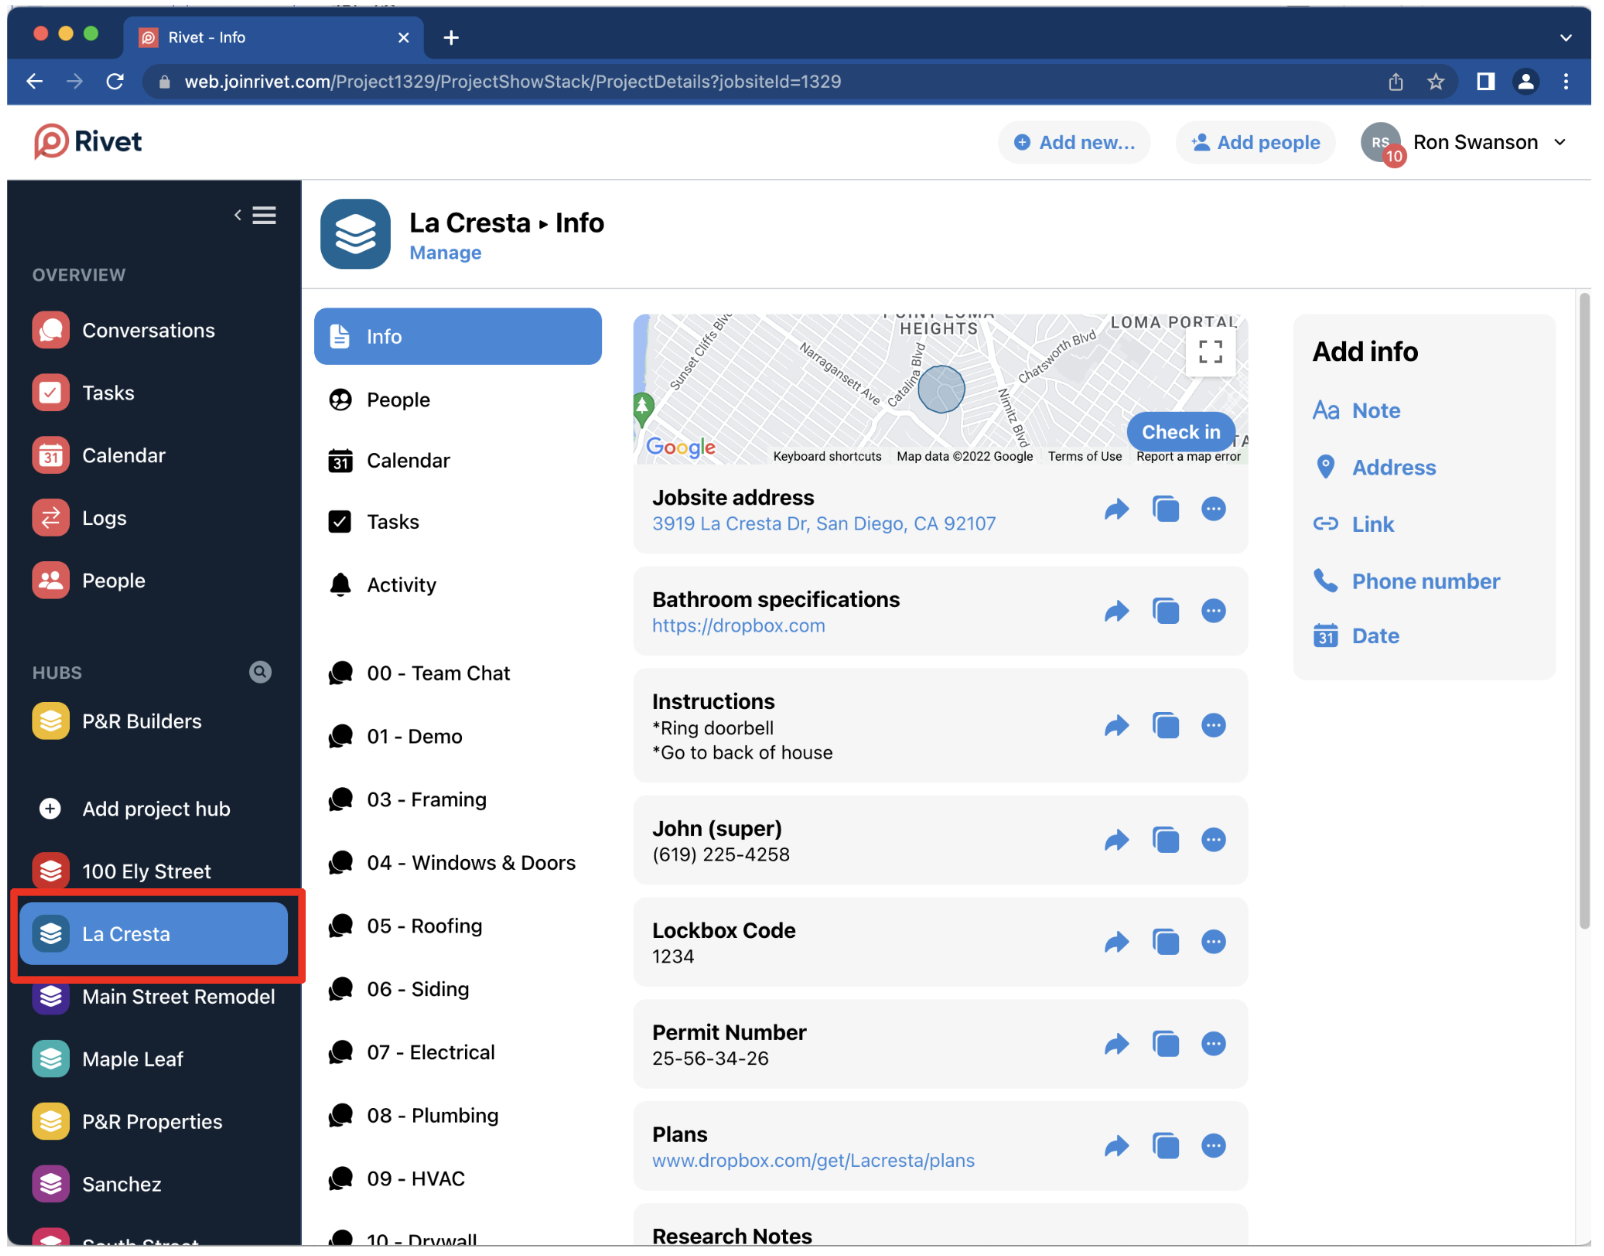
2. The controls to add info can be found in the grey box titled 'Add info'. Click the type of info you'd like to add!

Questions or requests? Reach out to us:
email: help@joinrivet.com
call/text: (510) 281-8840